I heart Auntie {Iron On Transfer} Shirt

Comments
Did all of you hear about the fires in San Diego last week?  Well, in case you didn't, let me fill you in...

There was 8 different fires throughout the county, over 30 homes were destroyed and 26,500+ acres burned.  It was scary, it felt like the whole county was on fire.  Between Santa Ana winds and 100+ degree temps, the firefighters had an uphill battle.

The first fire started last Tuesday, I was glued to the tv.  I've lived in San Diego for 13 years and we've had 2 terrible fires {2003 and 2007} and I remember how quickly they got out of control.  The neighborhood a few miles away from us was evacuated and I was so worried that we might be next.  Luckily the amazing firefighters got the flames under control and all evacuations were lifted... until the next day.

On Wednesday there was 5-6 more fires, this time houses were burning, thousands of people were being evacuated and it was just getting hotter and hotter.  Fires were popping up all over the county and they believe some of them were set deliberately.  Our amazing firefighters & military worked 24/7 putting out and containing the flames and thanks to them, all evacuations were lifted by Sunday morning.  As of today, all but 1 fire is 100% contained and the last one is over 95% contained, which is such a relief.

Now, that was enough to stress anyone out, but on top of that, my hubby & I had a {kid-free} trip to Seattle planned and we were flying out Thursday.  I was so freaked out about leaving my kids behind during a fire storm.  What if the winds changed direction? What if they got evacuated? Would they be safe?? ahhh!!!!  My head was spinning....  After consulting my hubby, friends and family, they all convinced me that WE NEEDED TO GO and that the kids will be fine!  They were in the safe hands of grandmothers and we had great friends near by to help with evacuations {if needed}.

So we went and had a fabulous time, {although, I did manage to check news reports about every hour or so....}  Needless to say, no blogging got done before or during the trip.

So here it is, a week later, a lot cooler {only a high of 75 today!} and I've got a lot of great things to share, starting with this Easy Iron On Transfer Tutorial.  I made these shirts for my sister and she loved them!


First I created the design on my Silhouette Cameo
Make sure to MIRROR the image, so it's backwards!
I cut the image from my Silhouette and then weeded out the parts I didn't want transferred.
Next I placed the design on the bottonm right corner of the shirt.
Next I ironed the image onto my shirt.  Be careful not to move the iron from side to side, instead press the iron down, lift up, move to next spot and press it down again.

This happened to mine when I "ironed" instead of "pressed"
 **Make sure to read the instructions for your specific heat transfer material**

However, the final product looked really cute and it just added a little something extra to a simple sleep shirt. :)

HAPPY CRAFTING!
(to see where I've linked up - click here!!)

post signature

Personalized Picture Frames {with vinyl}

Comments
Happy Monday!  Did you all have a great Mother's Day??  I hope all of you spoiled your mom {or got spoiled yourself}!!
I had a fantastic Mother's Day.  My kids SLEPT IN until after 9am!!!!  We actually woke up before them {I still can't believe it}.  They are usually up before 7am, but not yesterday.  My hubby woke up, kissed me and said, "This was your first mother's day present - sleeping in - I arranged it with the girls last night" hahahahahaha, he's so funny.  I wish it was actually possible for him to convince our 2 & 3 yr old to sleep in.... 

The rest of they day was relaxing, delightful and filled with love.  My munchkins {with the help of my hubby} made me an herb garden for my kitchen window.  I just love it!  Gifts made with LOVE are so special and better than anything they could have bought me.
We then spent the entire afternoon down by the bay... picnic, park, sunshine & some wine = very happy momma!  I finished my day with ice cream and Game of Thrones {did any of you watch last night?? Soooo good - right?!?!}
Anyhow, enough about my weekend, on to today's craft!  These personalized picture frames are really easy and a fun way to spruce up any frame. 
1) Create Design 
2) Cut design out on pretty colorful vinyl {using Silhouette, Cricket or something of the sort}
3) Weed (remove all un-needed vinyl)
4) Transfer to Transfer paper
5) Place onto your frame
Look at the cute result! 
These doggie frames were already super cute, but I think the names add just a little something extra.
The best part was that this craft took maybe 30 min - perfect for a busy mom like me! :)

HAPPY CRAFTING!
(to see where I've linked up - click here!!)

post signature

Pintastic Friday #9 {Sewing}

Comments
Welcome to Pintastic Friday!! 
For those of you here for the 1st time, here is a little recap...   I share a few of my favorite pins each week and then pick one to make.  Last week I selected a few favorites and the "goal" is to share my completed pin with you the next this week. So here is the big question... did I actually complete anything?    {drum-roll please....... }   
YES!!!


I had no doubt that I would finish this pin.  I went from never making muffins to making them ALL.THE.TIME.    I can never go wrong when it comes to a yummy new muffin recipe and last week there was too many to choose from!

 Banana Chocolate Chip Mini Muffins
Banana Chocolate Chip Muffins | A little about a Lot
This recipe does not disappoint!  These were delicious and they didn't last long!

********************************************
I must admit that sewing projects have always been a little daunting. I hand stitch with ease, but tackling a sewing machine has always been so intimidating to me.  I've been telling my husband for YEARS that I'm going to learn to sew, however my brand new sewing machine just sits there in the corner of my craft room...

Not any more!  I'm going to jump in with 2 feet and not look back!  Here are a few of the pins from my SEWING Pinterest board that I've had my eye on for quite a while.  

by: VixenMade
by: A Curiously Chic Life
Step3a
by: source unknown
Travel tip. Sew a few stitches on a towel and keep your toiletry dry. A fun gift idea, too. DIY...These would make great gifts for the travellers in my life :)
by: Confessions of a Serial Do-It-Yourselfer
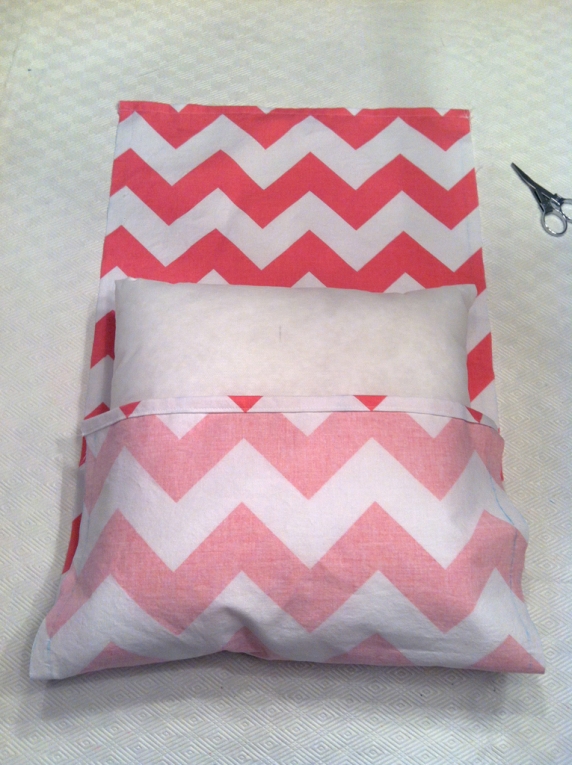
http://www.confessionsofaserialdiyer.com/wp-content/uploads/2013/05/cushion-10-feature-2.jpg
By: Pieces by Polly
 
Wish me luck!!

HAPPY CRAFTING SEWING!
(to see where I've linked up - click here!!)

post signature

Banana Chocolate Chip Mini Muffins

Comments
To be perfectly honest, I've never been much a muffin fan... however over the past year or so, I've come to really enojoy them.  

It all started with my hubby, he hates eating breakfast, however if we have muffins in the house, he'll eat those {strange I know}.  So after buying muffins for a few weeks, I realized that making them would be cheaper & I could take the regular muffin recipe and turn them into mini muffins, which are perfect for my little munchkins fingers :)
 Banana Chocolate Chip Mini Muffins | A little about a Lot
Last week's Pintastic post was a bunch of new recipes, so I thought it was time to finally try a new one out.  This recipe does not disappoint!  They were DELICIOUS! 
Banana Chocolate Chip Mini Muffins | A little about a Lot
My hubby & kids love muffins... especially when they are filled with chocolate chips {well who doesn't - right?}  and I love them because they are super easy to make and a great, quick snack that can be eaten on the go.
Banana Chocolate Chip Mini Muffins | A little about a Lot
Since we are always running late in this house, on the go food works for us!
Banana Chocolate Chip Mini Muffins | A little about a Lot
Here is how you make them.  Seriously, it's super easy and most of the ingredients are probably already in your cupboard.    

First you'll need your ingredients:  
Flour, Sugar, Baking Powder, Salt, Baking Soda, Bananas, Butter, Milk, Vanilla, Eggs & Chocolate Chips
Banana Chocolate Chip Mini Muffins | A little about a Lot
Today I was lucky, since I had my assistant helping... made it easier for me to take pics

I don't normally pour all the measurements out into separate bowls {since it just means more dishes for me to wash}, but since my little one was helping, this step made it much easier for her :)
Banana Chocolate Chip Mini Muffins | A little about a Lot
She's cute huh??

okay, back to the muffins

Combine your wet ingredients:  Milk, butter, eggs & vanilla
Banana Chocolate Chip Mini Muffins | A little about a Lot
Next combine your dry {except the sugar} ingredients in a large bowl: Flour, Salt, Baking Powder & Baking Soda
Banana Chocolate Chip Mini Muffins | A little about a Lot
 Now pour your wet ingredients into the bowl with your dry ones.

{do you see her little tongue sticking out?  When I'm concentrating, I do the exact same thing!}
Banana Chocolate Chip Mini Muffins | A little about a Lot
 Mix {just until combined}
Banana Chocolate Chip Mini Muffins | A little about a Lot
 Time to add the banana ** which you peeled and smashed up in a separate bowl**
 Banana Chocolate Chip Mini Muffins | A little about a Lot
 Stir in the banana
Banana Chocolate Chip Mini Muffins | A little about a LotBanana Chocolate Chip Mini Muffins | A little about a Lot 
Time for everyone's favorite part ... THE CHOCOLATE!
Banana Chocolate Chip Mini Muffins | A little about a Lot
She "sneaks" a few chips. but who doesn't?? hehe

She even shares them with her baby sister... thank you kisses... so adorable!!!!
Banana Chocolate Chip Mini Muffins | A little about a Lot 
Okay, back to the recipe, no more distracting photos.... 

Last but not least, you want to fold the sugar in gently.   This produces a muffin with a delicious, crunchy exterior without having to make a streusel.
Banana Chocolate Chip Mini Muffins | A little about a Lot
Interesting, huh?   I actually picked up this tip from Ina Garden {yes, yes, we are BFF's} hahaha, NOT!  I actually picked up the tip from watching one of her Food Network shows.

Time to scoop the mix into your muffin pan.  I use a mini muffin pan, but you could definitely use a regular muffin pan.  Use liners or spray with PAM first
Banana Chocolate Chip Mini Muffins | A little about a Lot
I use a melon baller to ensure that all the muffins will be the same size.
Banana Chocolate Chip Mini Muffins | A little about a Lot
Instead of making 2 batches of mini muffins, we made 1 batch of mini muffins and 1 batch of animal muffins.
Banana Chocolate Chip Mini Muffins | A little about a Lot
 Bake at 350° for about 12 minutes
Banana Chocolate Chip Mini Muffins | A little about a Lot
I tasted one before I remembered to take a pic... oops! 
Banana Chocolate Chip Mini Muffins | A little about a Lot
Of course my helper had to test one out too!
Banana Chocolate Chip Mini Muffins | A little about a Lot
These are how our animal muffins turned out.  My munchkin decided that these were "her & sissy's special muffins"
Banana Chocolate Chip Mini Muffins | A little about a Lot
 Banana Chocolate Chip Mini Muffins | A little about a Lot
Banana Chocolate Chip Mini Muffins | A little about a LotBanana Chocolate Chip Mini Muffins | A little about a Lot

FULL RECIPE
Mini Chocolate Chip Banana Muffins
2 cups all-purpose flour
1 teaspoon baking powder
1 teaspoon salt
1/2 teaspoon baking soda
1/2 cup butter {melted}
3/4 cup milk
1 teaspoon vanilla
2 eggs
3 ripe bananas {peeled and smashed up}
1 cup chocolate chips
1 cup sugar

Heat oven to 350. Combine flour, baking soda, baking powder & salt in a large mixing bowl, set aside.  In a smaller bowl combine the butter, milk, vanilla & eggs.  Pour the wet ingredients into the dry ingredients and MIX.   Stir in the bananas and the chocolate chips.  Lastly, fold in the sugar** 

Scoop batter into a greased bread muffin tins.  Bake mini-muffins for 12 minutes or until toothpick inserted comes out clean. Larger muffins will take approximately 25 minutes. Remove from oven and let cool 10 minutes. Complete cooling on a wire rack.
 
**This produces a muffin with a delicious, crunchy exterior without having to make a streusel. {tip I picked up from Ina Garden}
 
Banana Chocolate Chip Mini Muffins | A little about a Lot
 
 
HAPPY BAKING!
(to see where I've linked up - click here!!)
post signature
Related Posts Plugin for WordPress, Blogger...