Spring Decor & Easter Bunny Sign

Comments
My kids have been so excited for Easter all month!  When we decorated our front porch, my little ones thought that the Easter Bunny was coming the next day.... 
 Spring Decor | Easter Bunner Sign | A little about a lot
That was 2 weeks ago.  

So every morning we go through the same routine:  They wake up and ask "Did the Easter Bunny come?  Did he hide the eggs? " Then they proceed to look the window at the grass in the backyard.

We've tried to explain that Easter is in a "few weeks", but our 2 & 3 year old have no concept of real time.  They associate everything with, today, tomorrow or yesterday.  So it looks like it's gonna be Groundhog Day around here... until Easter Sunday finally arrives! {luckily we only have a few more days left. haha}
{we believe} in the Easter Bunny sign | A little about a Lot
I wanted to make this Easter Bunny sign last year, but never got around to it.  So this year I was determined to make it.  It cost me nothing {since I had all the supplies on hand}, but even if you had to purchase them, it couldn't be more than $5-7 and it turned out super cute!

This is pretty easy to make, especially if you have a Silhouette or Cricket.  I created my design on my Silhouette and then cut everything out on vinyl.
{we believe} in the Easter Bunny sign | A little about a Lot
 Got all my vinyl onto the transfer paper
{we believe} in the Easter Bunny sign | A little about a Lot
Time to line everything up.  

I used a canvas {because there was a great sale at Michael's and I stocked up!}.  However, you could use poster board, a piece of wood or even cardstock.
{we believe} in the Easter Bunny sign | A little about a Lot
 Tape everything down
{we believe} in the Easter Bunny sign | A little about a Lot
Time to start pressing the vinyl onto the canvas.  I started upside down, so I could get into all the areas around the wood edges
{we believe} in the Easter Bunny sign | A little about a Lot
For the top, I placed a thick book under, so while I was pushing, there was something hard underneath {since the wood edge creates a gap between the canvas & table}
{we believe} in the Easter Bunny sign | A little about a Lot
Peel off the transfer paper
{we believe} in the Easter Bunny sign | A little about a Lot
Next cover your letters in Mod Podge.  The reason is when you paint over the letters, the mod podge will create a barrier, so the paint won't bleed/leak under the vinyl.   You could bypass this step, but I recommend that you don't :)
{we believe} in the Easter Bunny sign | A little about a Lot
Once it dries, get your paint out
{we believe} in the Easter Bunny sign | A little about a Lot
Did you notice that I used an egg dying cup to paint my Easter sign? hehe.  Just trying to stay with the Easter theme :)

Start covering the canvas completely. 
{we believe} in the Easter Bunny sign | A little about a Lot
Don't forget the sides {I used my thick book again to hold up the canvas so I could paint the sides} 
{we believe} in the Easter Bunny sign | A little about a Lot
Now I forgot to take pics of this part... but once it's dry peel all the letters off carefully.

Here is how it will look!
{we believe} in the Easter Bunny sign | A little about a Lot
 It was the perfect addition to my Front Porch Spring Decor! 
Spring Decor | Easter Bunner Sign | A little about a lot
Don't you just LOVE that bunny vase?  My MIL gave it to me a few years ago and it's probably my favorite Spring/Easter decoration!
 Spring Decor | Easter Bunner Sign | A little about a lot
Spring Decor | Easter Bunner Sign | A little about a lot
Having kids reminds me how magical holidays can be.  Believing in the Easter Bunny is such a fun tradition that I love getting to experience all over again with my kids!
Spring Decor | Easter Bunner Sign | A little about a lot
HAPPY EASTER!
(to see where I've linked up - click here!!)

post signature 


More Easter Ideas:


{FREE} Easter Printable

Comments


{FREE} Easter Printable | Subway Art | A little about a Lot
Getting sick is terrible.

I've been fighting this dang cold for almost 2 weeks and I'm sick and tired of being sick and tired.

This cold messed up all my blogging plans.  I had all these great Easter crafts that I was going to share last week, but I just couldn't get around to it.  My head was pounding, my nose was running, my girls were on their WORST behavior and my patience had disappeared...
I went through about 8 boxes of tissues... 
I should have made myself one of these
On top of being sick, I spent last weekend helping my sister with some AMAZING chalkboard signs for her boyfriends, sister's wedding {will post pics soon},  planning my daughters 2nd bday party {which is in 11 days}, getting ready for Easter {in 5 days} and still trying to keep my house in tact.

Now that I'm feeling about 90% back to normal, I thought I'd take a break for my party planning to write a little post and share a FREE PRINTABLE!
{FREE} Easter Printable | Subway Art | A little about a Lot
Here is this adorably cute Easter Subway Art that I created and thought I'd share with all of you!

Just print out a copy, stick it in a frame and put on your mantle, coffee table or wall.  
{FREE} Easter Printable | Subway Art | A little about a Lot
Just click on the link below to download the Easter Printable
This will print out in 8x10, but if you want smaller, just shrink before printing {you should see an option in your printer settings}
Hopefully I can get a few more Easter crafts posted before the end of the week!

HAPPY EASTER!
(to see where I've linked up - click here!!)

post signature 


Pintastic Friday #7 {Easter}

Comments
Welcome to Pintastic Friday!! 
For those of you here for the 1st time, here is a little recap...   I share a few of my favorite pins each week and then pick one to make.  Last week I selected a few favorites and the "goal" is to share my completed pin with you the next this week. So here is the big question... did I actually complete anything?    {drum-roll please....... }  
YES!

Did you see last week's post with all the fun painting crafts for kids?  Since my little one LOVES painting, I knew this was going to be an easy craft to actually follow through with.

Colorful Initial Art
She had so much fun painting and she loved how it turned out.  "Look momma, it's an "M", just like Madison and just like Momma.  It's perfect!" 

******************************************** 

As much as I love this time of year, it's also the start of the busiest month of the year for me.  It starts with Easter... then my Nephew's bday, my daughter's bday, my MIL bday, my Dad's bday, Mother's Day & lastly my other Nephew's bday... 5 weekends full of family events!  

If I procrastinate the tiniest bit {which is my M.O.}, I will fall WAY behind.  Which is why I'm getting a head start.  Hopefully I can follow through :)

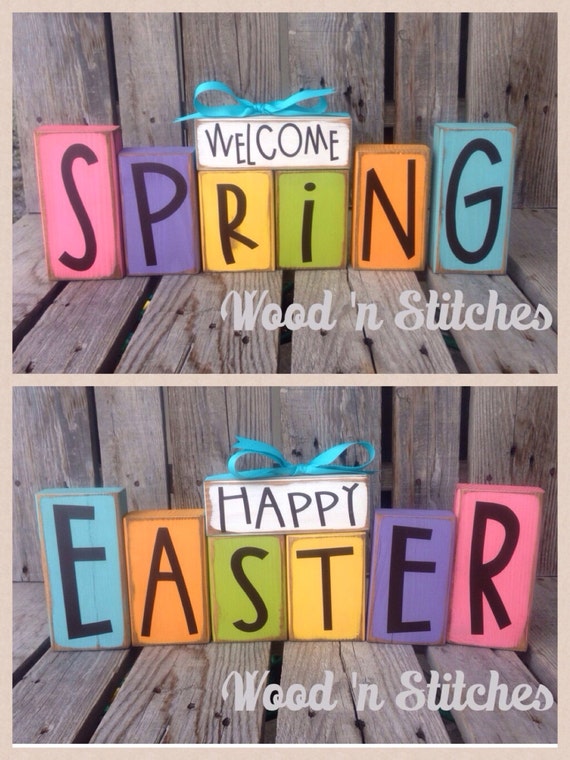
By Wood 'n Stiches - Etsy
Spring Easter reversible wood block set seasonal home decor Easter bunny chick flower gift photo prop

By Crafty Endeaver

By Today's Creative Blog
Decorating with rice

By A Glimpse Inside

source unknown
Cute Easter Decor! Love Easter time! Family and friends time! #easter #bunny #moments


HAPPY CRAFTING!
(to see where I've linked up - click here!!)

post signature

Colorful Initial Art

Comments
Hello!  Sorry for being a little MIA... my munchkin was on spring break all week, which has been good & bad.  It made my day a little less hectic {since I didn't have to be a taxi all day} but it also got our routine all out of wack!  

Since we were home most of the week,  I ended up spending a lot of time working on random projects around the house and trying to keep my {stir crazy} kids entertained.  So sadly my blog took a back seat... but I'm back!

Last week I posted a bunch of really cute and easy Pintastic painting crafts - for the kids.  Since my munchkin comes home with paintings every day from school, I thought this would be the perfect activity for her.  As soon as I told her we were painting, she was ECSTATIC!!  She couldn't wait to start.
Colorful Inital Art | Kid Painting Craft | A little about a Lot
First we got the paints out {old egg dying cups are perfect for this} and start laying the masking tape down.  
First was the "M"
Colorful Inital Art | Kid Painting Craft | A little about a Lot
Then we added a few diagonal lines and "stars"
Colorful Inital Art | Kid Painting Craft | A little about a Lot
Time to start painting!
Colorful Inital Art | Kid Painting Craft | A little about a Lot
I got this gigantic clipboard years ago and since we don't have an easel, this works out perfectly!
Colorful Inital Art | Kid Painting Craft | A little about a Lot
"Mommy, I'm done"
Colorful Inital Art | Kid Painting Craft | A little about a Lot
Let it dry {you can use a blow dryer to speed up the process}
Colorful Inital Art | Kid Painting Craft | A little about a Lot
 Once it's dry, carefully peel the masking tape off
Colorful Inital Art | Kid Painting Craft | A little about a Lot
By the time it dried, my munchkin was already sleeping, so she didn't see how it turned out, until the next morning...

She LOVED it!

I think that smile says is all :)
Colorful Inital Art | Kid Painting Craft | A little about a Lot
"Look momma, it's an "M", just like Madison and just like Momma.  It's perfect!"

HAPPY CRAFTING!
(to see where I've linked up - click here!!)

post signature
Related Posts Plugin for WordPress, Blogger...