Showing posts with label subway art. Show all posts

{FREE} Easter Printable

Comments


{FREE} Easter Printable | Subway Art | A little about a Lot
Getting sick is terrible.

I've been fighting this dang cold for almost 2 weeks and I'm sick and tired of being sick and tired.

This cold messed up all my blogging plans.  I had all these great Easter crafts that I was going to share last week, but I just couldn't get around to it.  My head was pounding, my nose was running, my girls were on their WORST behavior and my patience had disappeared...
I went through about 8 boxes of tissues... 
I should have made myself one of these
On top of being sick, I spent last weekend helping my sister with some AMAZING chalkboard signs for her boyfriends, sister's wedding {will post pics soon},  planning my daughters 2nd bday party {which is in 11 days}, getting ready for Easter {in 5 days} and still trying to keep my house in tact.

Now that I'm feeling about 90% back to normal, I thought I'd take a break for my party planning to write a little post and share a FREE PRINTABLE!
{FREE} Easter Printable | Subway Art | A little about a Lot
Here is this adorably cute Easter Subway Art that I created and thought I'd share with all of you!

Just print out a copy, stick it in a frame and put on your mantle, coffee table or wall.  
{FREE} Easter Printable | Subway Art | A little about a Lot
Just click on the link below to download the Easter Printable
This will print out in 8x10, but if you want smaller, just shrink before printing {you should see an option in your printer settings}
Hopefully I can get a few more Easter crafts posted before the end of the week!

HAPPY EASTER!
(to see where I've linked up - click here!!)

post signature 


Baptism Subway Art

Comments
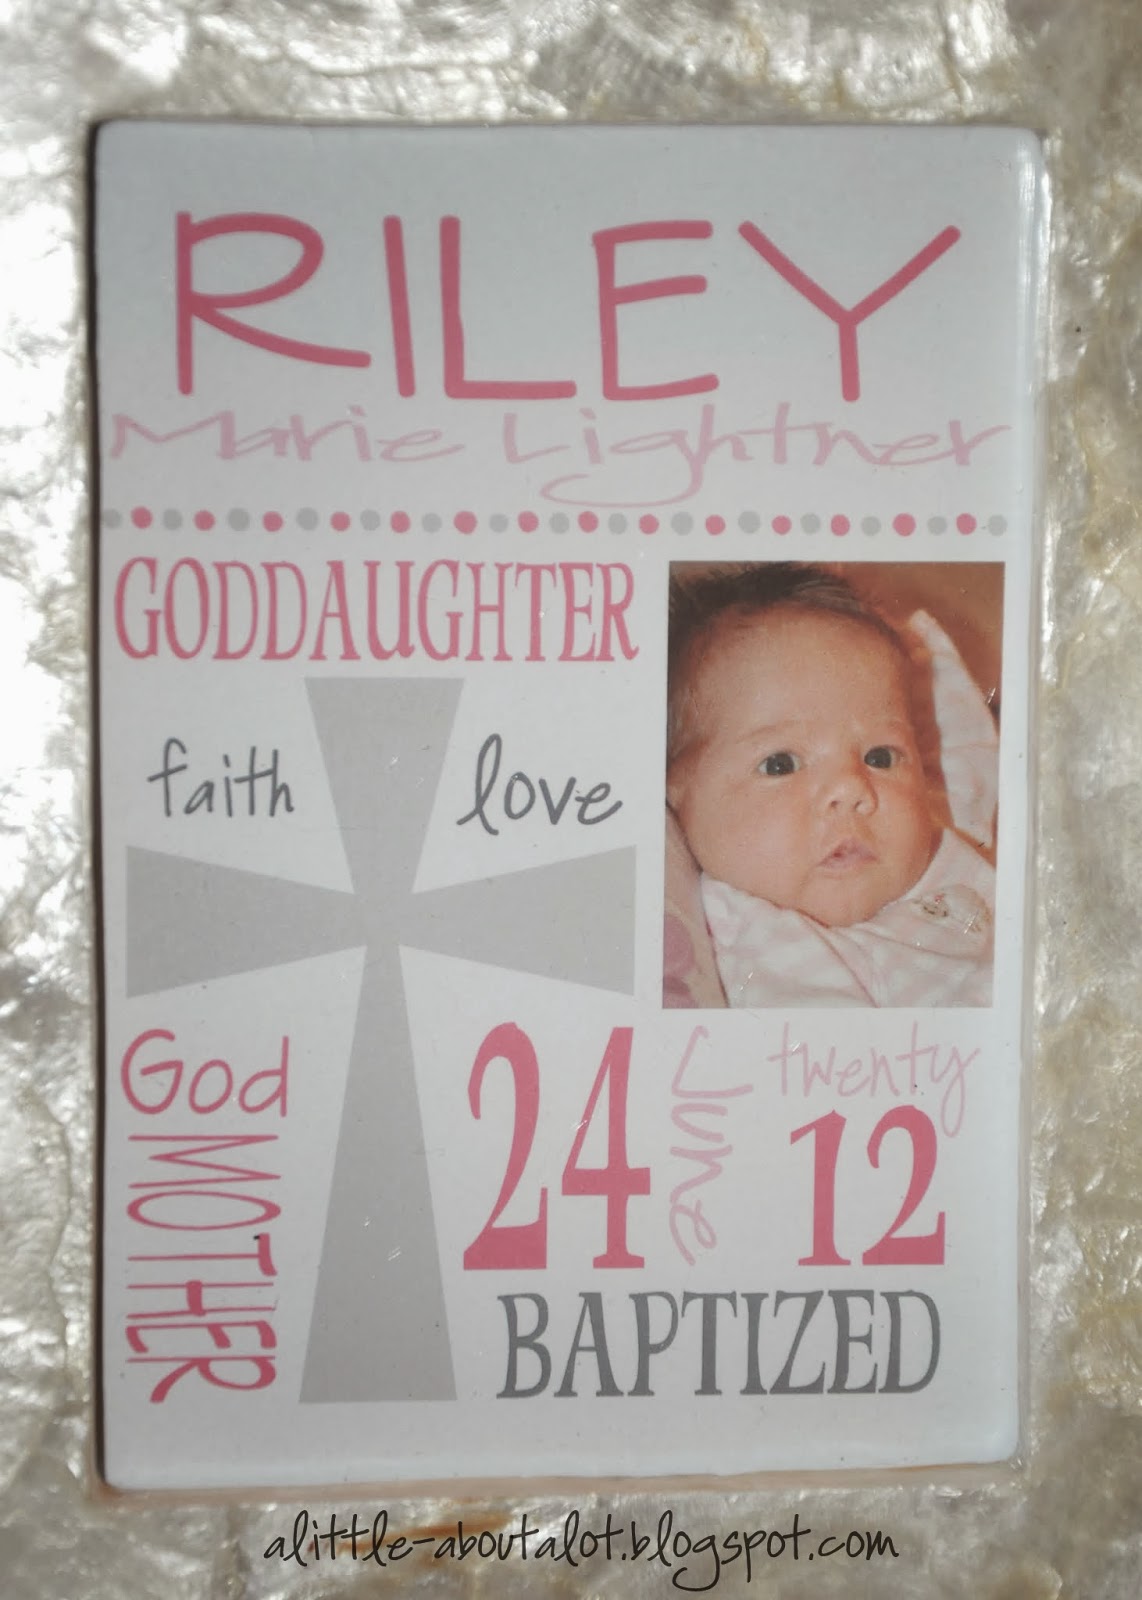
Today's project is very special to me, since it was made for my daughter's baptism.

When my 1st got baptized, I never gave the godparents anything {which I'm still feeling guilty about ---- 3 years later}.  Now Fast forward oops, I mean rewind to my 2nd daughters baptism... I knew I had to do something.

Every godparent gift I found online just didn't seem to interest me.  Most gifts were trinkets, that would probably get shoved into a drawer {never to be seen again}, while others were a little over the top {and expensive!!}.  I wanted something that they could keep out to remember the day & their goddaughter, but was also simple enough that it could blend in with any home decor.

Which made me think that framed subway art would be perfect. 
I created this Subway Art on my Silhouette and then just printed it on Cardstock and stuck it in a frame.  

Really really simple!

This one was for her Godfather. 
Since it was for a guy... I made the font a little edgier and used the black/brown frame
 Now for her Godmother...

 I found this beautiful pearl frame & used lighter colors and "girlier" fonts
I know you're curious

Or maybe I just want to show off my little angel

Here she is on her big day
 little angel - right?!?!?!

She was so good!  No crying & perfectly happy through the baptism,
then slept through the rest of church services

Here she is with her Godparents
{clearly a little cranky} 
guess she can't always be angelic! haha
 I know, I know, enough with family pics... :)
The gifts were a hit!  

I urge you to try and make one for yourself, but if you don't have the software {or just don't want to}, I'd love to create one for you!   Just check out my SHOP and send me an email!  :) 

HAPPY CRAFTING!
(to see where I've linked up - click here!!)

post signature

St. Patrick's Day Printable

9 comments
My new favorite thing is Subway Art, I think it's so much fun and so creative!  Two people can use the same words and even the same program to make something and the two projects will turn out completely different!  I just love the creative freedom it allows. :-D
In the past, I usually tried to find a few printables that I could just download and display (in a pretty frame), but this time I thought I'd make one myself.
Here's what I did:
  1. Create the "art" on my Silhouette Cameo
  2. Print
  3. Frame
  4. Add a few green and cream felt flowers to the frame     (felt flower tutorial - click here)
  5. Place on mantel
Looks cute huh?
I have to say, for it being my 1st one, I was very proud of myself - haha.  

Now on to the good stuff... 
Below is a .PDF version that you can download and print for yourself - FOR FREE!
ENJOY!
UPDATE:
Since this is my 1st time trying to attach a .PDF to my blog, I wasn't sure which program was the best (and easiest) for YOU to use and download (with little hassle).  Anyhow, I originally attached the documents using Scribd, but now I'm also going to attach it using 4Shared.  

Please let me know which is more user friendly for YOU, since that's what matters! THANKS :)
St. Patrick's Day Printable - using 4shared

St. Patrick's Day Printable - using Scribd
HAPPY CRAFTING!
(to see where I've linked up - click here!!)

Military Subway Art - Tutorial

43 comments
 
Last week my Aunt threw a homecoming party for my cousin, who has been in the Air Force for the past 4 years.  He has completed his service and is finally back home!  I wanted to give him a gift... something that he could always look at and be reminded of the service he provided to our country.
 
Subway Art was my first thought!  My husband and I compiled a list of words that we thought suited him (and someone in the military), next we got a list of all the places that he was stationed in the past 4 years, along with his first and last date of service.

I created the template on my Silhouette Cameo.  I played with the fonts, sizes and direction until I had the layout exactly how I wanted it.
I like filling in the words with colors, instead of just looking at stencils/outlines.  It give me a better idea of how the finished product will look :)

The fonts I used were: 1) Stencil  2) Braggadocio  3) American Typewriter  4) LW Headline  5) SNF Petite Hand  (#1-3 are fonts provided in the Silhouette and # 4-5 were purchase from the Silhouette online store)

Next, I got my wood, paint and brush and got to work.

After the paint dried, I took some sand paper and sanded the whole thing a bit, especially around the edges.  Sand it as little or as much as you think looks right for your project (sorry, I forgot to take a picture after sanding it).
While I was waiting for the paint to dry, I cut my template out and got it all ready to transfer.  Since I was using 2 different colors, I cut 2 separate templates

1) the whole pattern in black vinyl
2) just the 5 words in tan vinyl

Since I didn't want some of the words (in black) to transfer, I laid some paper over them, so I could transfer all the other letters.

This was how it looked after the 1st layer was done.
Next, I placed the tan layer right on top and lined up the letters with the blank spaces and transferred them next.
All done.  
Time to make the next one
Yes, I made two 
I thought that my Aunt would like one (probably more) than my cousin would.  haha

Additional Info: To be honest, I had some trouble getting the vinyl to stick to the wood, I think it was because I tried to place the vinyl too soon after sanding the wood - there must have been a thin layer of dust that was preventing the transfer.  Anyhow, my remedy was this:  After sanding it, I applied a thin layer or Mod Podge, let it dry, then applied the vinyl.  After the vinyl was placed, I then put another thin layer of Mod Podge down over all the letters.  Once all the letters were placed, I applied another 2 coats of Mod Podge over the whole project to ensure that none of the letters would fall off, plus it gave it a nice finished look that I really liked.

I'd love to hear any troubles & remedies you'd have when trying to apply vinyl too!
(to see where I've linked up - click here!)
Related Posts Plugin for WordPress, Blogger...